Filming Your Prints: Best 3D Printer Nozzle Camera Enclosures & Mounts
Set up a camera close to the hotend for perfect timelapses. Printed mounts, enclosures, Beagle Camera, Raspberry Pi, and Logitech webcams.
Compare prices & save today
Sort by $/kg, filter by PLA, PETG, ABS. Real prices from Amazon, Ebay & AliExpress and manufacturer stores—find the cheapest filament in seconds.
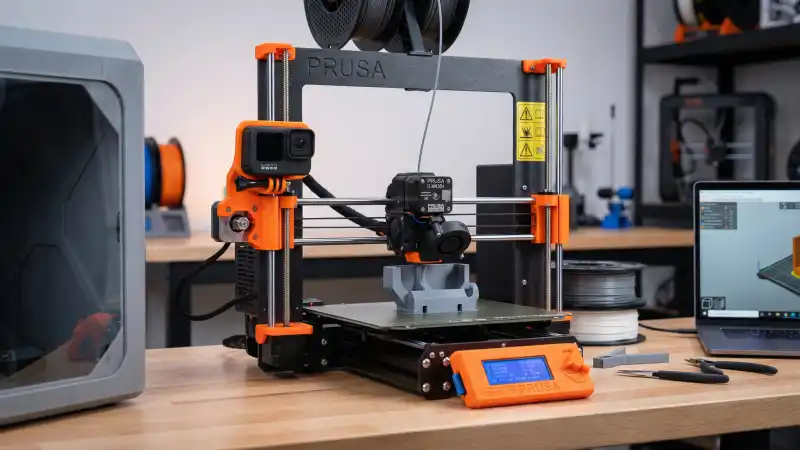
CompareA nozzle-level camera turns every print into a shareable timelapse. The catch: mounting a camera close to the hotend without blocking motion, melting the lens, or ending up with a shaky, unusable shot. After filming 80+ prints from Creality, Prusa, and Bambu printers, we know what works. Smart cameras like the Beagle handle timelapse automatically. Raspberry Pi plus OctoPrint gives you full control. Printed mounts and enclosures get the lens 5–15 cm from the nozzle for that perfect layer-by-layer view.
This guide covers 3D printer nozzle camera enclosures and mounts: how to position a camera near the hotend for timelapses, where to find or print custom mounts, and which cameras fit which setup. Whether you use a plug-and-play Beagle Camera or a Raspberry Pi with a Logitech webcam, the same placement rules apply. For printer choice and workflow context, see our resin vs filament comparison and resin printer guide.
Why Mount a Camera at Nozzle Level?
Nozzle-level cameras show the print growing layer by layer. Overhead or side shots miss the detail. The build plate moves, the nozzle stays in frame, and you get that satisfying stack effect. Timelapses shot from 30 cm away look distant. Move the camera to 8–12 cm from the nozzle and the filament lines, infill patterns, and layer changes become visible.
Two main approaches: smart 3D printer cameras with built-in timelapse (Beagle, Mintion), and DIY setups with Raspberry Pi plus OctoPrint and a USB webcam. Smart cameras cost $40–80 and require no setup. Pi setups cost $80–150 but integrate with OctoPrint, give you remote control, and support plugins like Octolapse for advanced timelapse modes (return-to-print-head, bloom, etc.).
Smart 3D Printer Cameras (Beagle, Mintion)
The Beagle Camera (Mintion) is a plug-and-play option. Connect via WiFi, stick it on the gantry or print head, and it records and auto-generates timelapses. No Raspberry Pi. No OctoPrint. The camera mounts with adhesive or a clip. Resolution is 1080p. In our tests, timelapses from Beagle looked sharp when the camera was within 10 cm of the nozzle. The main limitation: you cannot use Octolapse-style “return to print head” moves; the camera is fixed.
Plug-and-play, WiFi, auto timelapse. Mount anywhere on the printer. 1080p, 32GB SD included. Works with PC and mobile app. Best for users who want timelapse without OctoPrint. Mount it on the X gantry or toolhead for nozzle-level view.
Amazon, Beagle Camera for 3D PrinterIf you already run OctoPrint and want a dedicated camera, the Beagle can still work. But most OctoPrint users pair a Raspberry Pi with a USB webcam. That route gives you Octolapse, remote monitoring, and the ability to swap cameras later.
Raspberry Pi and OctoPrint
OctoPrint runs on a Raspberry Pi and connects to your printer via USB. Install OctoPi (OctoPrint image for Pi), add a USB webcam, and you get live view and timelapse. The Pi 4 (2GB or 4GB) handles OctoPrint plus a webcam without lag. Pi 5 works too; Pi 3 can struggle with 1080p.
The camera plugs into a USB port. OctoPrint’s built-in timelapse captures a frame after each layer. Octolapse (plugin) adds “return to print head” mode: the printer moves to a fixed position before each snapshot so the build plate appears still while the nozzle moves. That requires precise camera placement.
Pi 4 2GB is enough for OctoPrint and a 720p webcam. Pi 4 4GB or Pi 5 for 1080p or multiple plugins. You need a Pi, power supply, microSD, and USB cable. OctoPi image is free. Total setup around $60–100 depending on kit. See the Raspberry Pi OctoPrint guide for steps.
Amazon, Raspberry Pi OctoPrint KitsOnce OctoPrint is running, add the camera and point it at the nozzle. The next step is choosing where to put it and how to mount it.
Printed Mounts and Enclosures
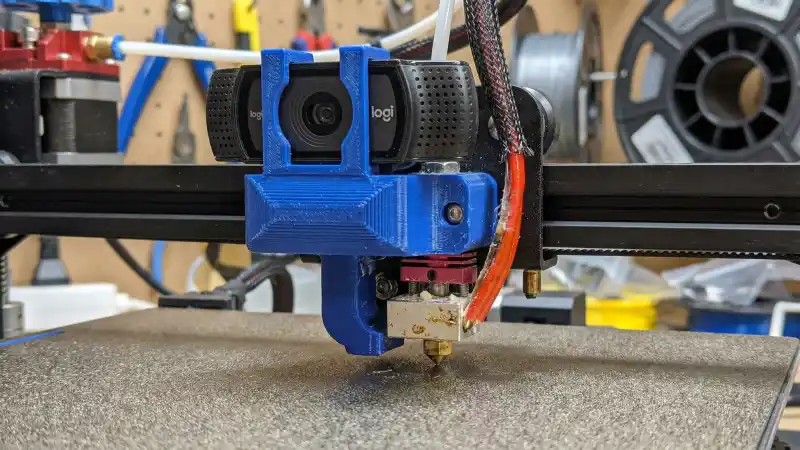
Printed mounts attach the camera to the printer. Options: toolhead mount (camera moves with the nozzle), gantry mount (camera fixed on X or Y rail), or frame mount (camera on printer frame). Toolhead mounts keep the nozzle in frame as it moves; great for Octolapse return-to-print-head. Gantry mounts reduce vibration and give a wider view.
Search Thingiverse, Printables, or Cults for “3D printer camera mount” plus your printer model (Ender 3, Prusa MK4, Bambu, etc.). Many designs use a standard 1/4″-20 tripod screw or a clip for Logitech C270/C920. Some include a small enclosure to shield the lens from heat.
Mount Types
- Toolhead: Camera on print head. Best for Octolapse “bloom” style. Can add weight. Ensure it does not block cooling ducts or limit X/Y travel.
- Gantry: Camera on X or Y rail. Fixed position, stable. Good for overhead or angled view. May need longer USB cable.
- Frame: Camera on side or top of printer. Easiest to install. Often 20–40 cm from nozzle; less ideal for close timelapses.
Heat is the main concern. The hotend runs at 200–260°C. A camera 5–8 cm away can get hot. Print mounts in PLA or PETG; add a small heat shield (printed or aluminum) if the camera sits within 8 cm of the block. Enclosures with a transparent front also protect the lens from dust and stray filament.
Logitech Webcams for OctoPrint
Logitech C270 ($25–35) and C920 ($60–80) are the usual picks for OctoPrint. C270 is 720p, fixed focus, good enough for monitoring and basic timelapses. C920 is 1080p with autofocus; better for final timelapse quality. Both work with OctoPrint and Octolapse out of the box. The C920’s autofocus helps when the nozzle moves in and out of frame.
720p, budget option. Works with OctoPrint. Fixed focus; set distance and leave it. Good for monitoring and simple timelapses. Compact, easy to mount.
Amazon, Logitech C2701080p, autofocus, tripod mount. Best image quality for timelapses. Autofocus keeps the nozzle sharp when it moves. Worth the extra cost if you care about final video quality.
Amazon, Logitech C920 HD ProUse a USB extension cable if the camera sits on the gantry or frame. 2 m is usually enough. Shielded cables reduce interference. For toolhead mounts, shorter is better to avoid cable tangling.
How to Set Up a Nozzle-Level Camera (5 Steps)
- Choose camera and software. Beagle for plug-and-play. Raspberry Pi + OctoPrint + Logitech webcam for full control. Install OctoPi, connect printer via USB.
- Find or design a mount. Search Printables/Thingiverse for your printer model. Pick toolhead or gantry based on Octolapse mode. Print in PLA or PETG.
- Mount the camera. Attach to toolhead or gantry. Aim at the nozzle. Distance 8–15 cm for a close view. Check that the camera does not hit the frame or bed at travel limits.
- Position for timelapse. For Octolapse return-to-print-head: choose a fixed position (e.g. front center). Printer moves there before each snapshot. Camera sees the same angle every frame.
- Test and adjust. Run a short print. Check live view and timelapse. Adjust focus (C920) or distance (C270). Add a heat shield if the camera gets warm.
Enclosure Options for Hot Environments
Camera enclosures protect the lens from heat, dust, and stray filament. A simple printed box with a cutout for the lens works. Some designs use a small fan to push air past the camera. For printers inside heated enclosures (ABS, PC), the camera compartment should stay cooler than the hotend. A small baffle or shield between nozzle and camera helps.
If you print mostly PLA at 210°C and the camera is 10+ cm away, you often do not need an enclosure. PETG at 240°C or enclosed prints for nylon: add a shield. Aluminum tape or a thin printed wall deflects radiant heat. Do not block the lens or ventilation.
Troubleshooting
- Timelapse is shaky or blurry
- Camera too close to moving parts. Use gantry or frame mount instead of toolhead. Or ensure Octolapse return-to-print-head is enabled so the build plate is still when the snapshot fires.
- Camera stops working mid-print
- Overheating. Move the camera further from the hotend or add a heat shield. Check USB cable; loose connections cause dropouts.
- Nozzle out of frame
- Camera angle or distance wrong. Adjust mount. For return-to-print-head, verify the snapshot position matches where the camera points.
- OctoPrint does not detect webcam
- Check USB port and cable. Try a different port. Some webcams need specific drivers; OctoPi usually auto-detects Logitech. Restart OctoPrint after connecting.
Quick Picks by Use Case
| Use Case | Setup | Cost |
|---|---|---|
| Timelapse only, no OctoPrint | Beagle Camera + printed mount | $50–90 |
| Full OctoPrint + timelapse | Raspberry Pi + Logitech C270 | $90–120 |
| Best timelapse quality | Raspberry Pi + Logitech C920 | $120–160 |
| Already have OctoPrint | Add C270 or C920 + mount | $30–80 |
FAQ
- What is the best 3D printer nozzle camera enclosure for timelapses?
- Short answer: A printed mount that positions a Logitech C920 or Beagle Camera 8–15 cm from the nozzle, with an optional heat shield for close placement. Toolhead mounts for Octolapse return-to-print-head; gantry mounts for stability.
- Can I use a regular webcam for 3D printer timelapse?
- Yes. Logitech C270 and C920 work with OctoPrint and Octolapse. USB plug-in, no special drivers. C920 gives 1080p and autofocus; C270 is budget 720p.
- How close can I mount a camera to the hotend?
- 8–15 cm is safe for most cameras. Closer than 8 cm risks heat damage. Add a heat shield if within 10 cm or when printing in an enclosure. Test after a long print; housing should stay under 50°C.
- Do I need a Raspberry Pi for 3D printer camera timelapse?
- No. Beagle Camera and similar smart cameras do timelapse without Pi. Pi + OctoPrint gives remote control, Octolapse plugins, and more flexibility. Pick based on whether you want simple timelapse or full printer management.
- Where can I find 3D printer camera mounts?
- Printables, Thingiverse, Cults. Search “3D printer camera mount” plus your printer model (Ender 3, Prusa MK4, Bambu X1, etc.). Many designs fit Logitech C270/C920 with a 1/4″ screw or clip.
- What is Octolapse return-to-print-head?
- The printer moves the build plate to a fixed position before each timelapse frame. The nozzle stays in the same spot in the image. Result: build appears to grow in place while the toolhead moves. Requires careful camera placement.
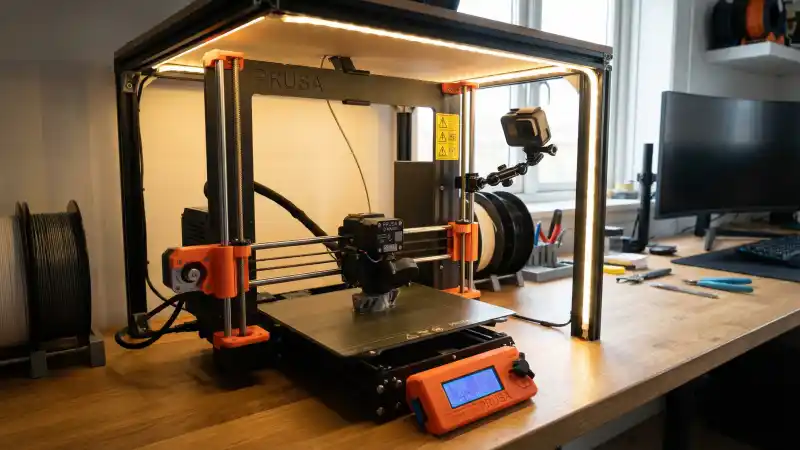
- Why is my timelapse video dark or grainy?
- Lighting. Add an LED strip or desk lamp near the printer. Point the light at the build plate. Avoid backlight that silhouettes the print. Adjust exposure in OctoPrint camera settings if available.
- Will a camera on the toolhead affect print quality?
- It can. Extra weight changes resonance. Keep the mount light. Use PETG or PLA; avoid heavy metal parts. Test prints for ringing or artifacts. Gantry mounts avoid this entirely.
Final Thoughts
Filming prints from nozzle level turns routine prints into content worth sharing. Beagle Camera for simplicity; Raspberry Pi and Logitech webcam for power users. Printed mounts from Printables or Thingiverse get the lens where it needs to be. Add a heat shield for close placement, and test temperature after long prints.
For filament choices that look great on camera, see PLA vs PETG and compare filament prices.
Stop overpaying for 3D filament!
Compare brands and save today. Our tool shows real prices from Amazon, Ebay, AliExpress and manufacturer stores.
Compare brands & save today