How to Unclog a 3D Printer Nozzle (The Ultimate 3-Step Guide)
Cold pull first, acupuncture needles for burnt PLA, replace when cleaning costs more than a new nozzle. No disassembly required.
Compare prices & save today
Sort by $/kg, filter by PLA, PETG, ABS. Real prices from Amazon, Ebay & AliExpress and manufacturer stores—find the cheapest filament in seconds.
CompareA clogged nozzle ruins prints. Uneven extrusion, stringing, gaps in layers. After running 50+ kg through various printers, we have a simple rule: try cold pull first, needle for burnt PLA, replace when cleaning costs more than a new nozzle.
This guide walks you through the three-method approach to cleaning 3D printer nozzles. You will learn the cold pull technique (no disassembly), when acupuncture needles work for burnt PLA clogs, and when a $2 nozzle replacement beats hours of fighting. For material context, our PLA vs PETG guide covers why different filaments behave differently in the hotend.
What Causes Nozzle Clogs?
Nozzle clogs fall into three categories: soft debris (dust, carbonized bits), burnt PLA or PETG stuck in the orifice, and mechanical damage (worn or corroded bore).
Soft clogs respond to cold pull. Burned plastic often needs a needle or heat cycling. A deformed or worn nozzle (common after 500+ hours with abrasive filament) should be replaced. Carbon fiber and glow-in-the-dark filaments wear brass nozzles quickly. See our strongest filaments guide for when a hardened nozzle is required.
Method 1. Cold Pull (The 3-Step Process)
Cold pull uses the filament itself to drag debris and residue out of the nozzle. No disassembly. No needles. Prusa's knowledge base documents it, and it works on any FDM printer with direct-drive or bowden setup.
- Heat and push. Set nozzle to 230°C (PLA) or 250°C (PETG). Push 20–30mm of filament until it extrudes cleanly. You need fresh plastic in the melt zone.
- Cool while holding pressure. Start cooldown but keep pushing gently. At 170°C, the plastic begins to solidify. Keep pressure so it bonds to debris. At 90–100°C, it is firm enough to pull.
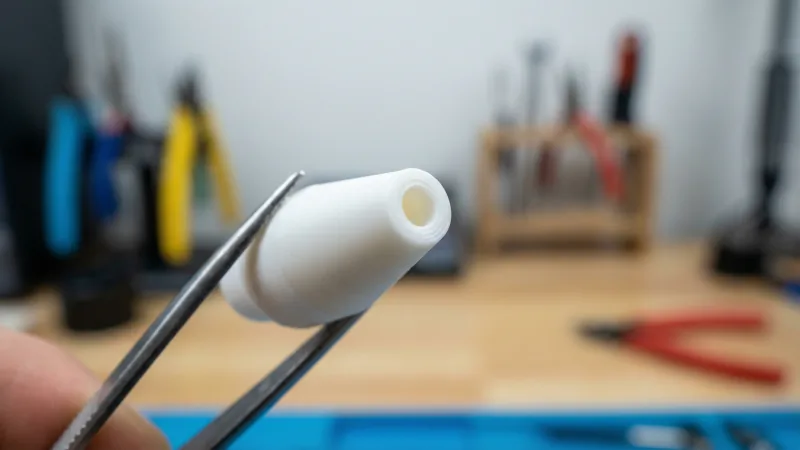
- Pull straight up. Grasp the filament with pliers and pull vertically. Do not angle. A clean pull shows the nozzle bore imprint on the tip. Repeat 2–3 times until the tip comes out clean.
Success looks like a tapered plug with the nozzle shape. Dark spots or mixed colors mean debris. Run another pull. After 3 failed attempts, move to Method 2 or 3.
Cold pull works best when filament still flows. If nothing extrudes, the blockage is likely complete. Try needles or replace. For the full procedure by printer type, Prusa's cold pull guide covers MK3, MK4, and MINI.
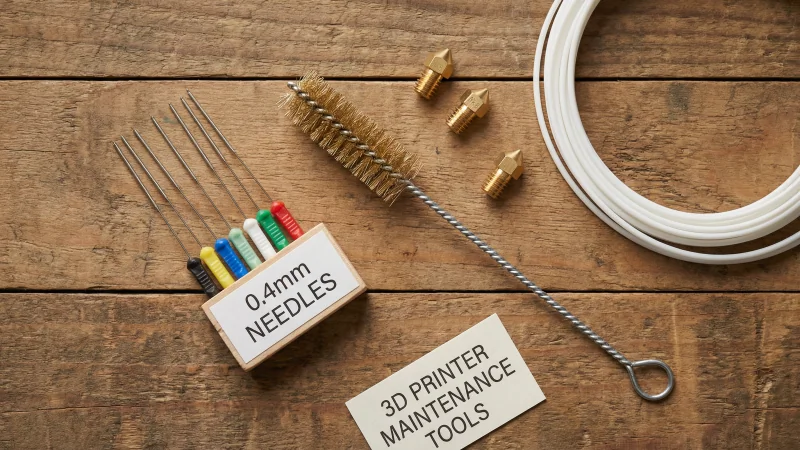
Tools You Need
0.4mm needles fit standard nozzles. They clear burnt PLA stuck in the orifice without scratching brass. Kits with 10–20 needles cost $4–8 and last years. Use only when the nozzle is hot (180°C+) so plastic is soft.
Amazon, Nozzle Cleaning Kit (needles + brushes)Pliers (needle-nose work), a heat-resistant surface, and optionally a bulk needle pack if you go through them. One needle per clog is typical; bent tips happen, so spares help.
Method 2. Acupuncture Needles for Burnt PLA
When cold pull fails because nothing extrudes, burnt PLA has usually carbonized in the nozzle. Acupuncture-style cleaning needles (0.4mm for 0.4mm nozzles) poke through the soft plastic when hot.
Step-by-Step
- Heat the nozzle to 200–210°C. PLA softens; PETG needs 220°C. Do not go above 230°C or you risk degrading the plastic further.
- Remove filament. Unload completely so the melt zone is empty.
- Insert needle from below. Push gently through the nozzle orifice. Move in and out 2–3 times. Burnt chunks will break loose.
- Extrude to clear. Reload filament, run 20–30mm extrusion. Repeat needle + extrude if needed.
Use 0.4mm needles for 0.4mm nozzles. For 0.6mm, use 0.5–0.6mm or a thin guitar string. Never force. If the needle bends, replace it. Scratched brass changes flow.
Cleans the outside of the nozzle after a cold pull or needle clear. Carbonized plastic builds on the tip. A soft brass brush removes it without damaging the nozzle. Avoid steel brushes on brass.
Amazon, Nozzle Kit with Brass Brushes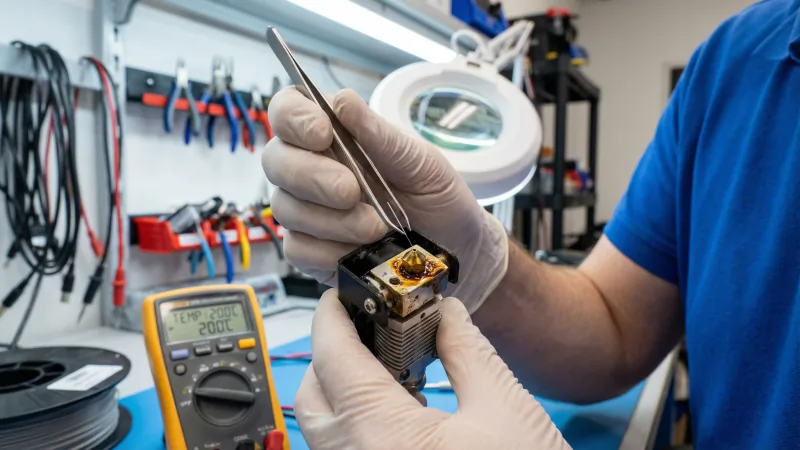
Method 3. When to Replace the Nozzle
Replace when cleaning costs more than a new nozzle. Brass 0.4mm nozzles run $1–3 each. Multipacks of 10–20 cost $8–15. If you have spent 2+ hours and multiple cold pulls plus needles with no improvement, swap it.
Also replace when: the bore looks worn or oval, you see scratches from needles, you have printed 500+ hours of abrasive filament (CF, glow, wood), or the nozzle tip is deformed. A worn bore causes inconsistent extrusion no amount of cleaning fixes.
Keep a few spares. Swapping takes 5 minutes: heat to 250°C, wrench off, screw new one on, re-level. For food-safe printing, our food safe filaments guide explains why a dedicated stainless nozzle matters.
MK8 and V6-style nozzles in 0.4mm are interchangeable across most Creality, Ender, and Prusa-style printers. A 10-pack runs $8–12. Check your printer model; Bambu and some direct-drive systems use proprietary nozzles.
Amazon, Replacement Nozzle Multipack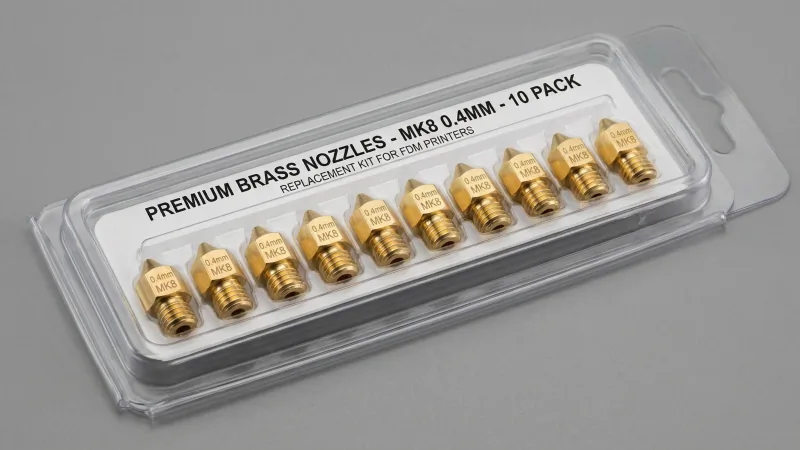
Troubleshooting
- Cold pull snaps or breaks
- Cool slower. Pull at 95–100°C, not 110°C. Use PLA; nylon and cleaning filament work but need different temps. If it keeps snapping, try a needle clear first to loosen the blockage.
- Needle does not go through
- Nozzle too cold or too hot. 200–210°C for PLA. For PETG, 220°C. Wrong needle size (0.4mm for 0.4mm nozzle). If still stuck, heat to 250°C, run extrusion, then try needle.
- Extrusion still uneven after cleaning
- Worn nozzle bore. Replace. Or check for a gap between nozzle and heat break; that causes jams. Tighten nozzle against heat break when hot (250°C).
- Clog keeps coming back
- Wet filament, dust, or wrong temps. Dry filament 4–6 hours at 45°C. Check bowden tube for play. Ensure hotend fan runs. For recyclables and waste, see our PLA recycle guide.
Quick Decision Guide
| Clog Type | Best Method | Time |
|---|---|---|
| Partial clog, some extrusion | Cold pull | 5–10 min |
| Nothing extrudes, soft blockage | Needle + extrude | 5–15 min |
| Burnt/carbonized plastic | Needle at 200°C | 10–20 min |
| Worn bore, 500+ hours abrasive | Replace nozzle | 5 min |
| Cleaning failed 3+ times | Replace nozzle | 5 min |
FAQ
- How do I unclog a 3D printer nozzle?
- Short answer: Start with a cold pull. Heat to 230°C, push filament, cool to 95°C while holding pressure, pull straight up with pliers. If that fails, use 0.4mm acupuncture needles at 200°C. Replace the nozzle if cleaning does not work after 2–3 attempts.
- What is the cold pull method?
- Cold pull uses filament to drag debris out of the nozzle. You heat, push, cool slowly while keeping pressure, then pull. The solidified plug pulls residue with it. No disassembly. Works for soft clogs and carbonized bits that cold pull can grab.
- Can I use a needle to clean my 3D printer nozzle?
- Yes. 0.4mm acupuncture-style needles fit 0.4mm nozzles. Heat to 200–210°C, remove filament, push needle through from below. Use for burnt PLA when cold pull fails. Do not force; bent needles can scratch brass.
- When should I replace my nozzle instead of cleaning it?
- Replace when cleaning fails after 2–3 tries, the bore looks worn or oval, you have 500+ hours on abrasive filament, or the nozzle tip is deformed. Brass nozzles cost $1–3 each; time is worth more.
- What temperature for cold pull?
- Heat to 230°C for PLA, 250°C for PETG. Cool to 95–100°C before pulling. Pull too early and the plug is too soft; too late and it snaps. 95°C is the sweet spot for PLA.
- Why does my nozzle keep clogging?
- Wet filament, dust, wrong temps, or a worn nozzle. Dry filament 4–6 hours. Check bowden tube seating. Ensure hotend fan runs. After 500 hours with abrasive filament, replace the nozzle.
- What size needle for 0.4mm nozzle?
- Use 0.4mm needles. For 0.6mm nozzles, 0.5–0.6mm works. Never use a needle larger than the orifice; it can damage the bore.
- Can I use a drill bit to clean the nozzle?
- No. Drill bits are harder than brass and will scratch or deform the bore. Use acupuncture needles (softer) or replace the nozzle. Scratches cause uneven flow.
- How often should I clean my nozzle?
- When you see problems: uneven extrusion, stringing, gaps. No fixed schedule. Cold pull every 50–100 hours as prevention works. More often if you switch materials or use abrasive filaments.
Final Thoughts
Unclogging a 3D printer nozzle is methodical. Cold pull first. Needles for burnt PLA. Replace when cleaning stops making sense. Keep a needle kit and a few spare nozzles; you will use them.
Compare filament prices on our main tool. For material choices, see PLA vs PETG and strongest filaments.
Stop overpaying for 3D filament!
Compare brands and save today. Our tool shows real prices from Amazon, Ebay, AliExpress and manufacturer stores.
Compare brands & save today