The 5-Minute Resin Vat Cleaning Method
Three levels of cleaning, FEP care, time-saving hacks, and troubleshooting. Smart maintenance without wasting time.
Compare prices & save today
Sort by $/kg, filter by PLA, PETG, ABS. Real prices from Amazon, Ebay & AliExpress and manufacturer stores—find the cheapest filament in seconds.
CompareCleaning your resin vat is nobody's favorite part of 3D printing—messy, time-consuming, and easy to do wrong. After hundreds of prints and too many ruined FEP screens, here's the fastest, most effective vat cleaning method that actually works.
This guide covers when to clean, three levels of cleaning intensity, FEP care, time-saving hacks, and a complete troubleshooting section. No perfectionism—just smart, efficient maintenance.
Why Vat Cleaning Actually Matters
A dirty vat isn't just annoying—it actively destroys your print quality:
- Cured resin particles create bumps and defects on your build plate
- Cloudy FEP from residue reduces UV transmission and causes failed prints
- Mixed resin types in the vat create unpredictable results
- Debris gets baked into your prints, creating permanent flaws
The good news? You don't need to deep-clean after every single print. Understanding when and how to clean makes all the difference.
The Three Levels of Vat Cleaning
Not every print job requires the same cleaning effort. Match your cleaning method to the situation:
Level 1: Quick Filter (Between Prints, Same Resin)
When to use: Printing the same resin color back-to-back with no failures. Time: 2 minutes.
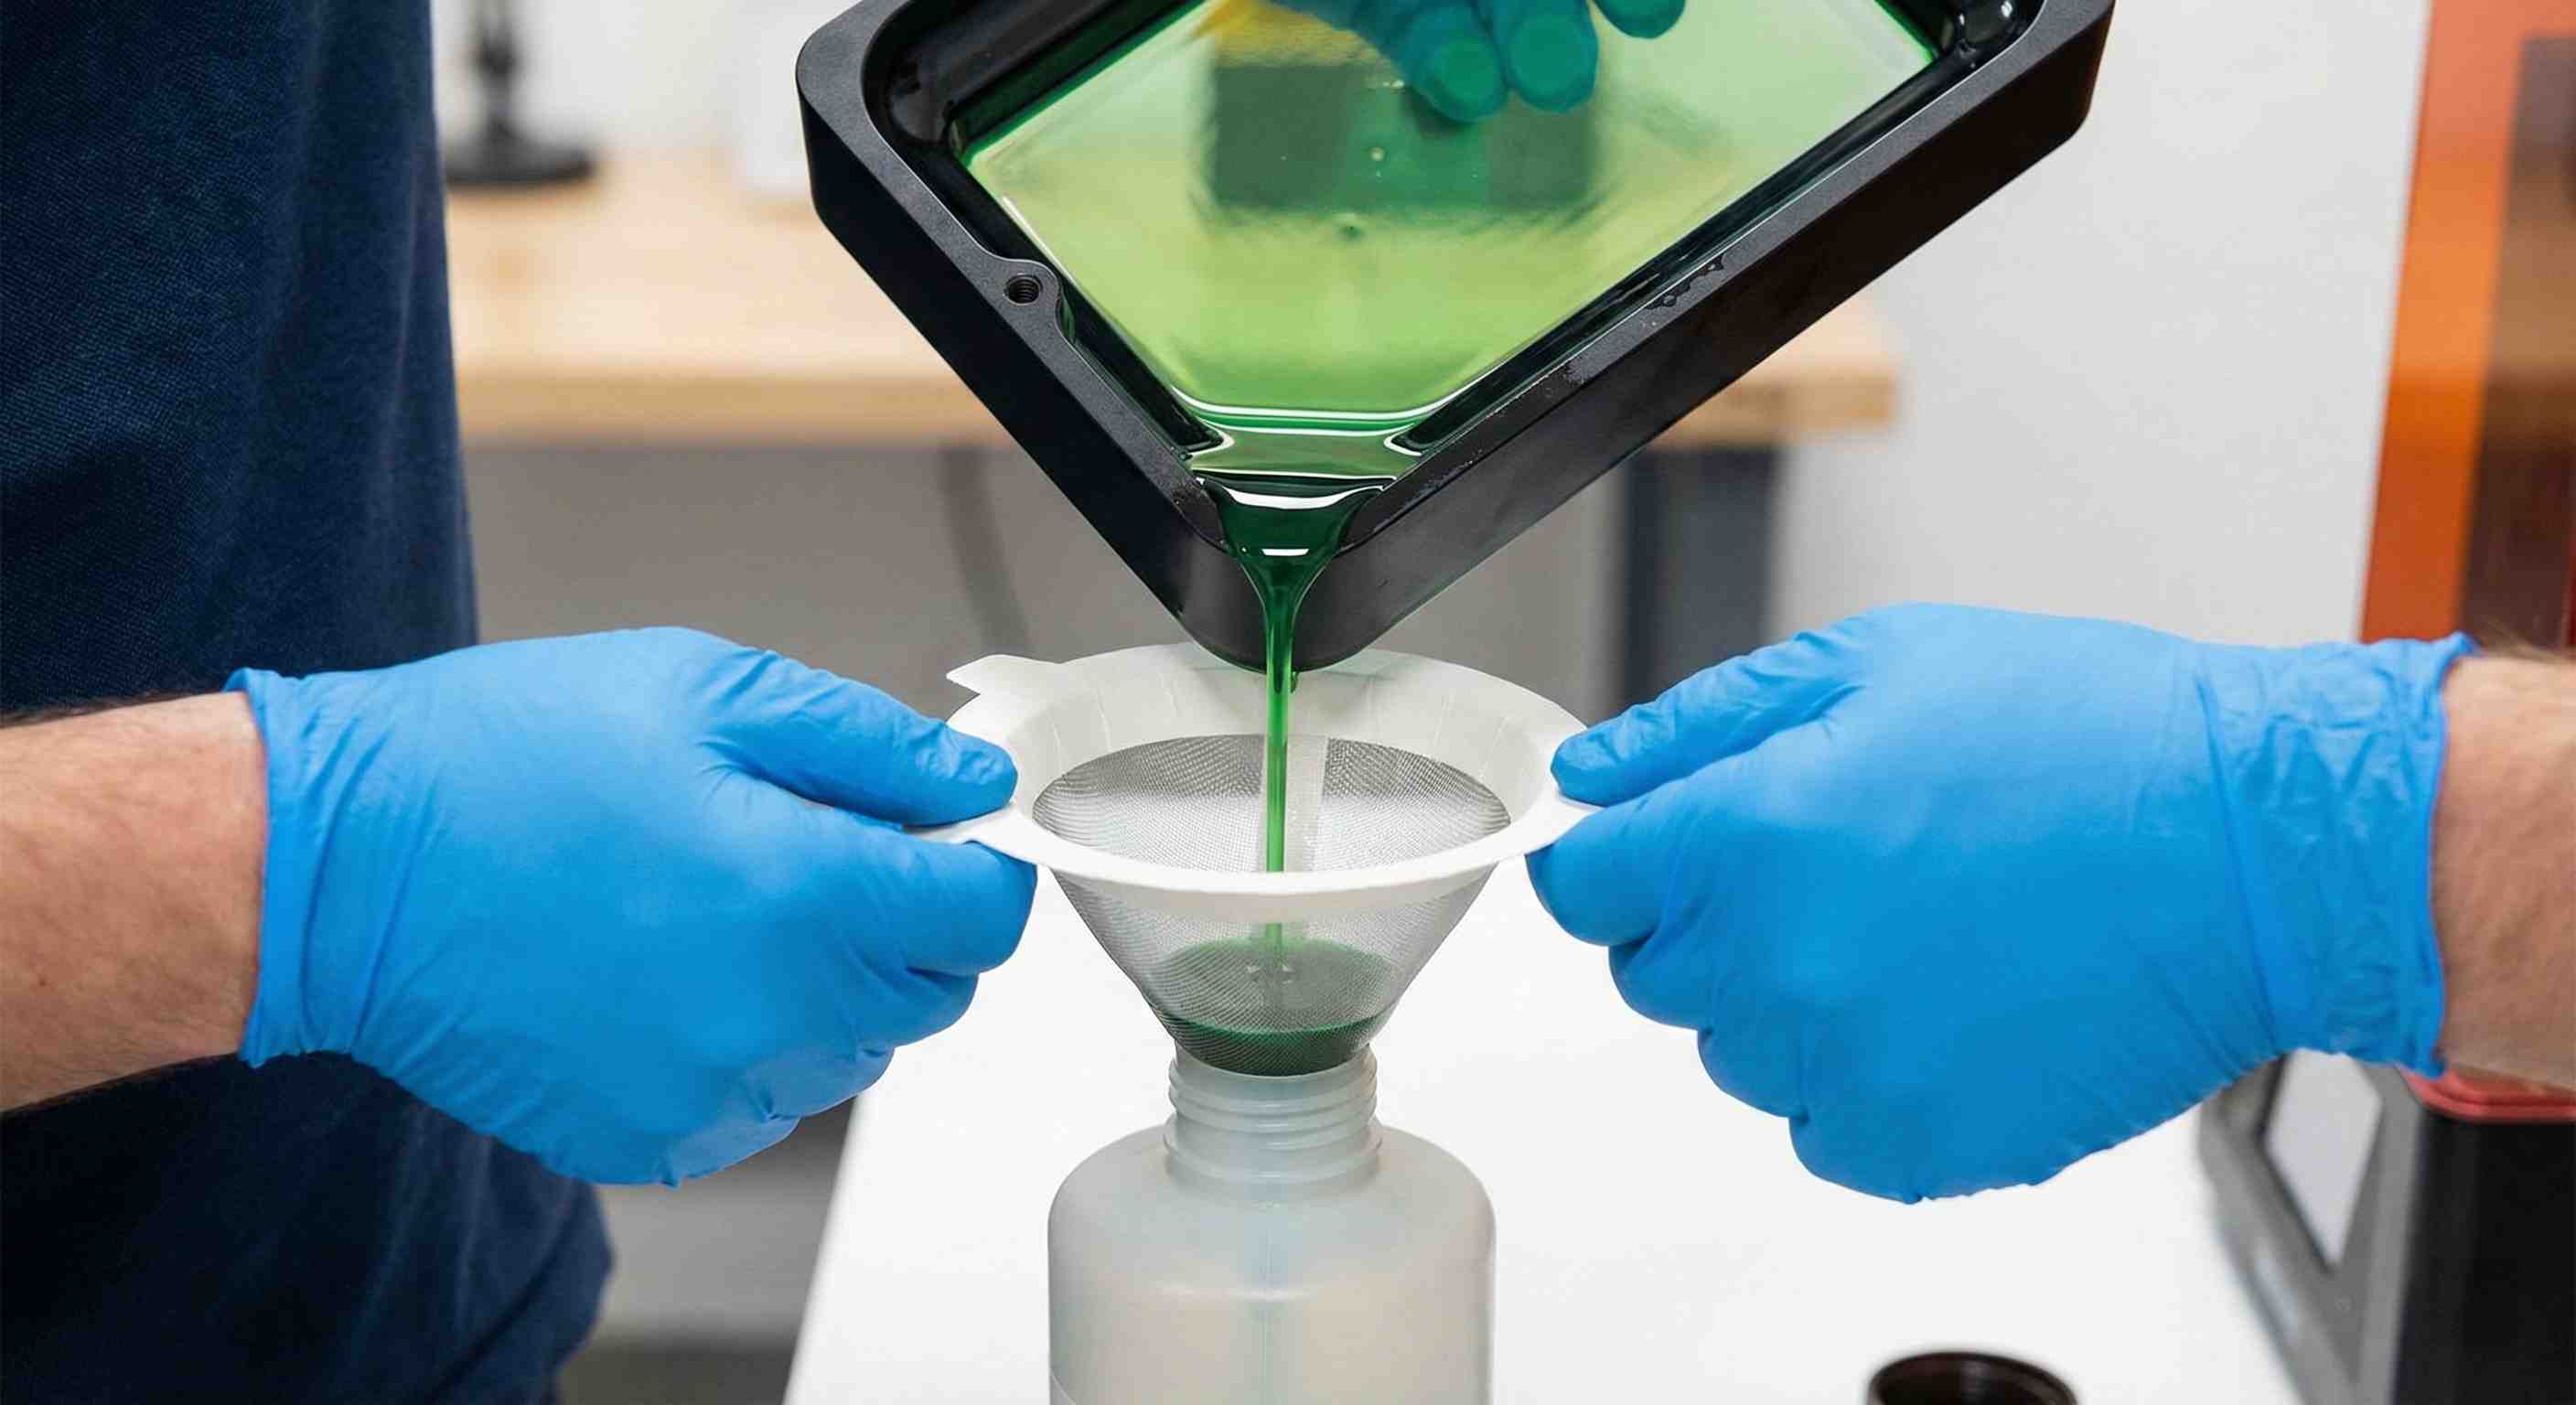
- Pour resin through a paint strainer back into the bottle
- Wipe vat edges with a lint-free cloth
- Pour filtered resin back in
- Done
Level 2: Standard Clean (Changing Colors/Resins)
When to use: Switching resin types or after a minor print failure. Time: 5–7 minutes.
- Pour resin through strainer back to bottle
- Wipe remaining resin with paper towels
- Spray with IPA, wipe clean
- Final wipe with dry microfiber cloth
- Inspect FEP for damage
- Add new resin
This handles 90% of situations.
Level 3: Deep Clean (After Failures or Monthly)
When to use: Failed prints, visible FEP cloudiness, or once a month. Time: 15 minutes.
- Remove all resin (filter and bottle it)
- Remove vat from printer completely
- Careful FEP cleaning (see below)
- Inspect and tighten FEP if needed
- Clean vat frame and rails
- Reassemble and refill
The FEP Film: Handle With Care
The FEP film is a 0.15–0.2 mm thick transparent fluoropolymer that costs $10–20 to replace—but replacing it means downtime and recalibration. Here's how to keep it alive.
What NOT to Do
- Never use paper towels directly on FEP—rough fibers create microscratches that scatter UV light. Use only lint-free microfiber cloths.
- Never use metal scrapers—even "soft" metal is harder than FEP. Only use plastic scrapers softer than FEP.
- Never use acetone—it chemically attacks FEP. Stick to IPA (isopropyl alcohol) only.
- Never scrub in circles—circular motion creates visible swirl marks. Always wipe in straight lines from one edge to the other.
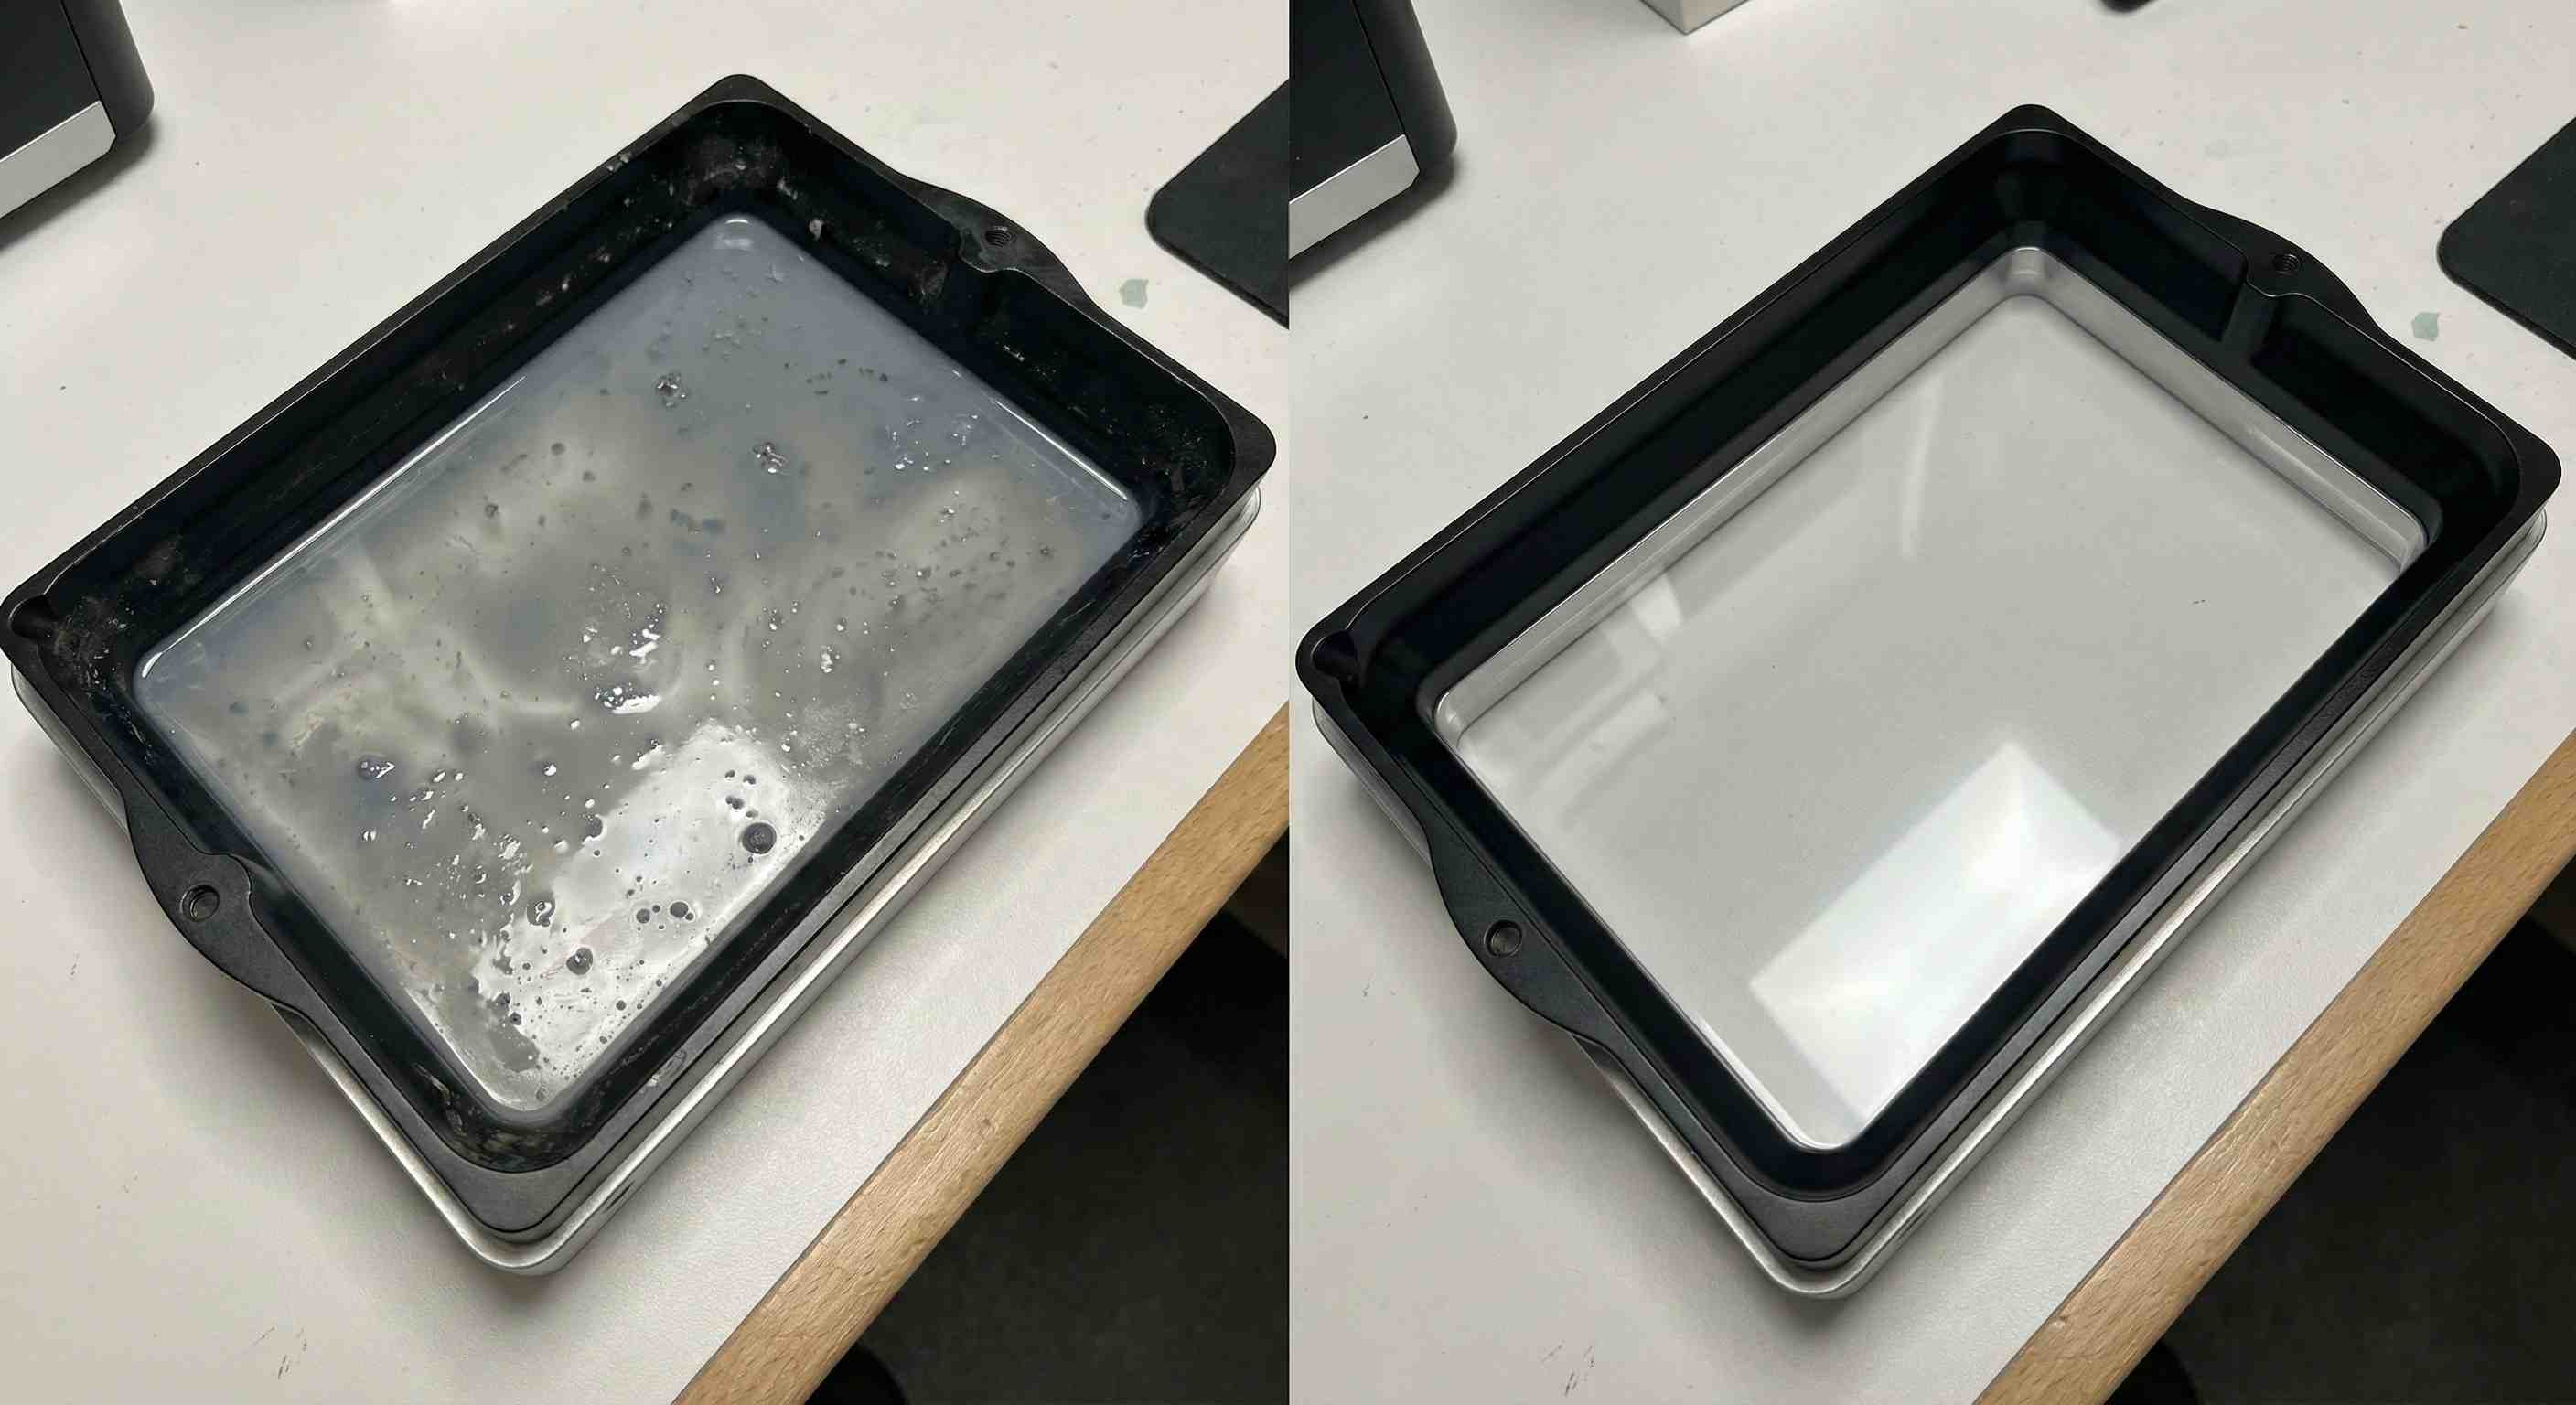
The Right Way to Clean FEP
For light cleaning (no stuck resin):
- Spray 90%+ IPA liberally on FEP
- Let it sit for 30–45 seconds so IPA dissolves uncured resin
- Wipe gently with folded microfiber cloth in one direction (edge to edge)
- Flip cloth to clean side, spray again with IPA
- Final wipe in perpendicular direction
- Buff dry with completely dry microfiber cloth
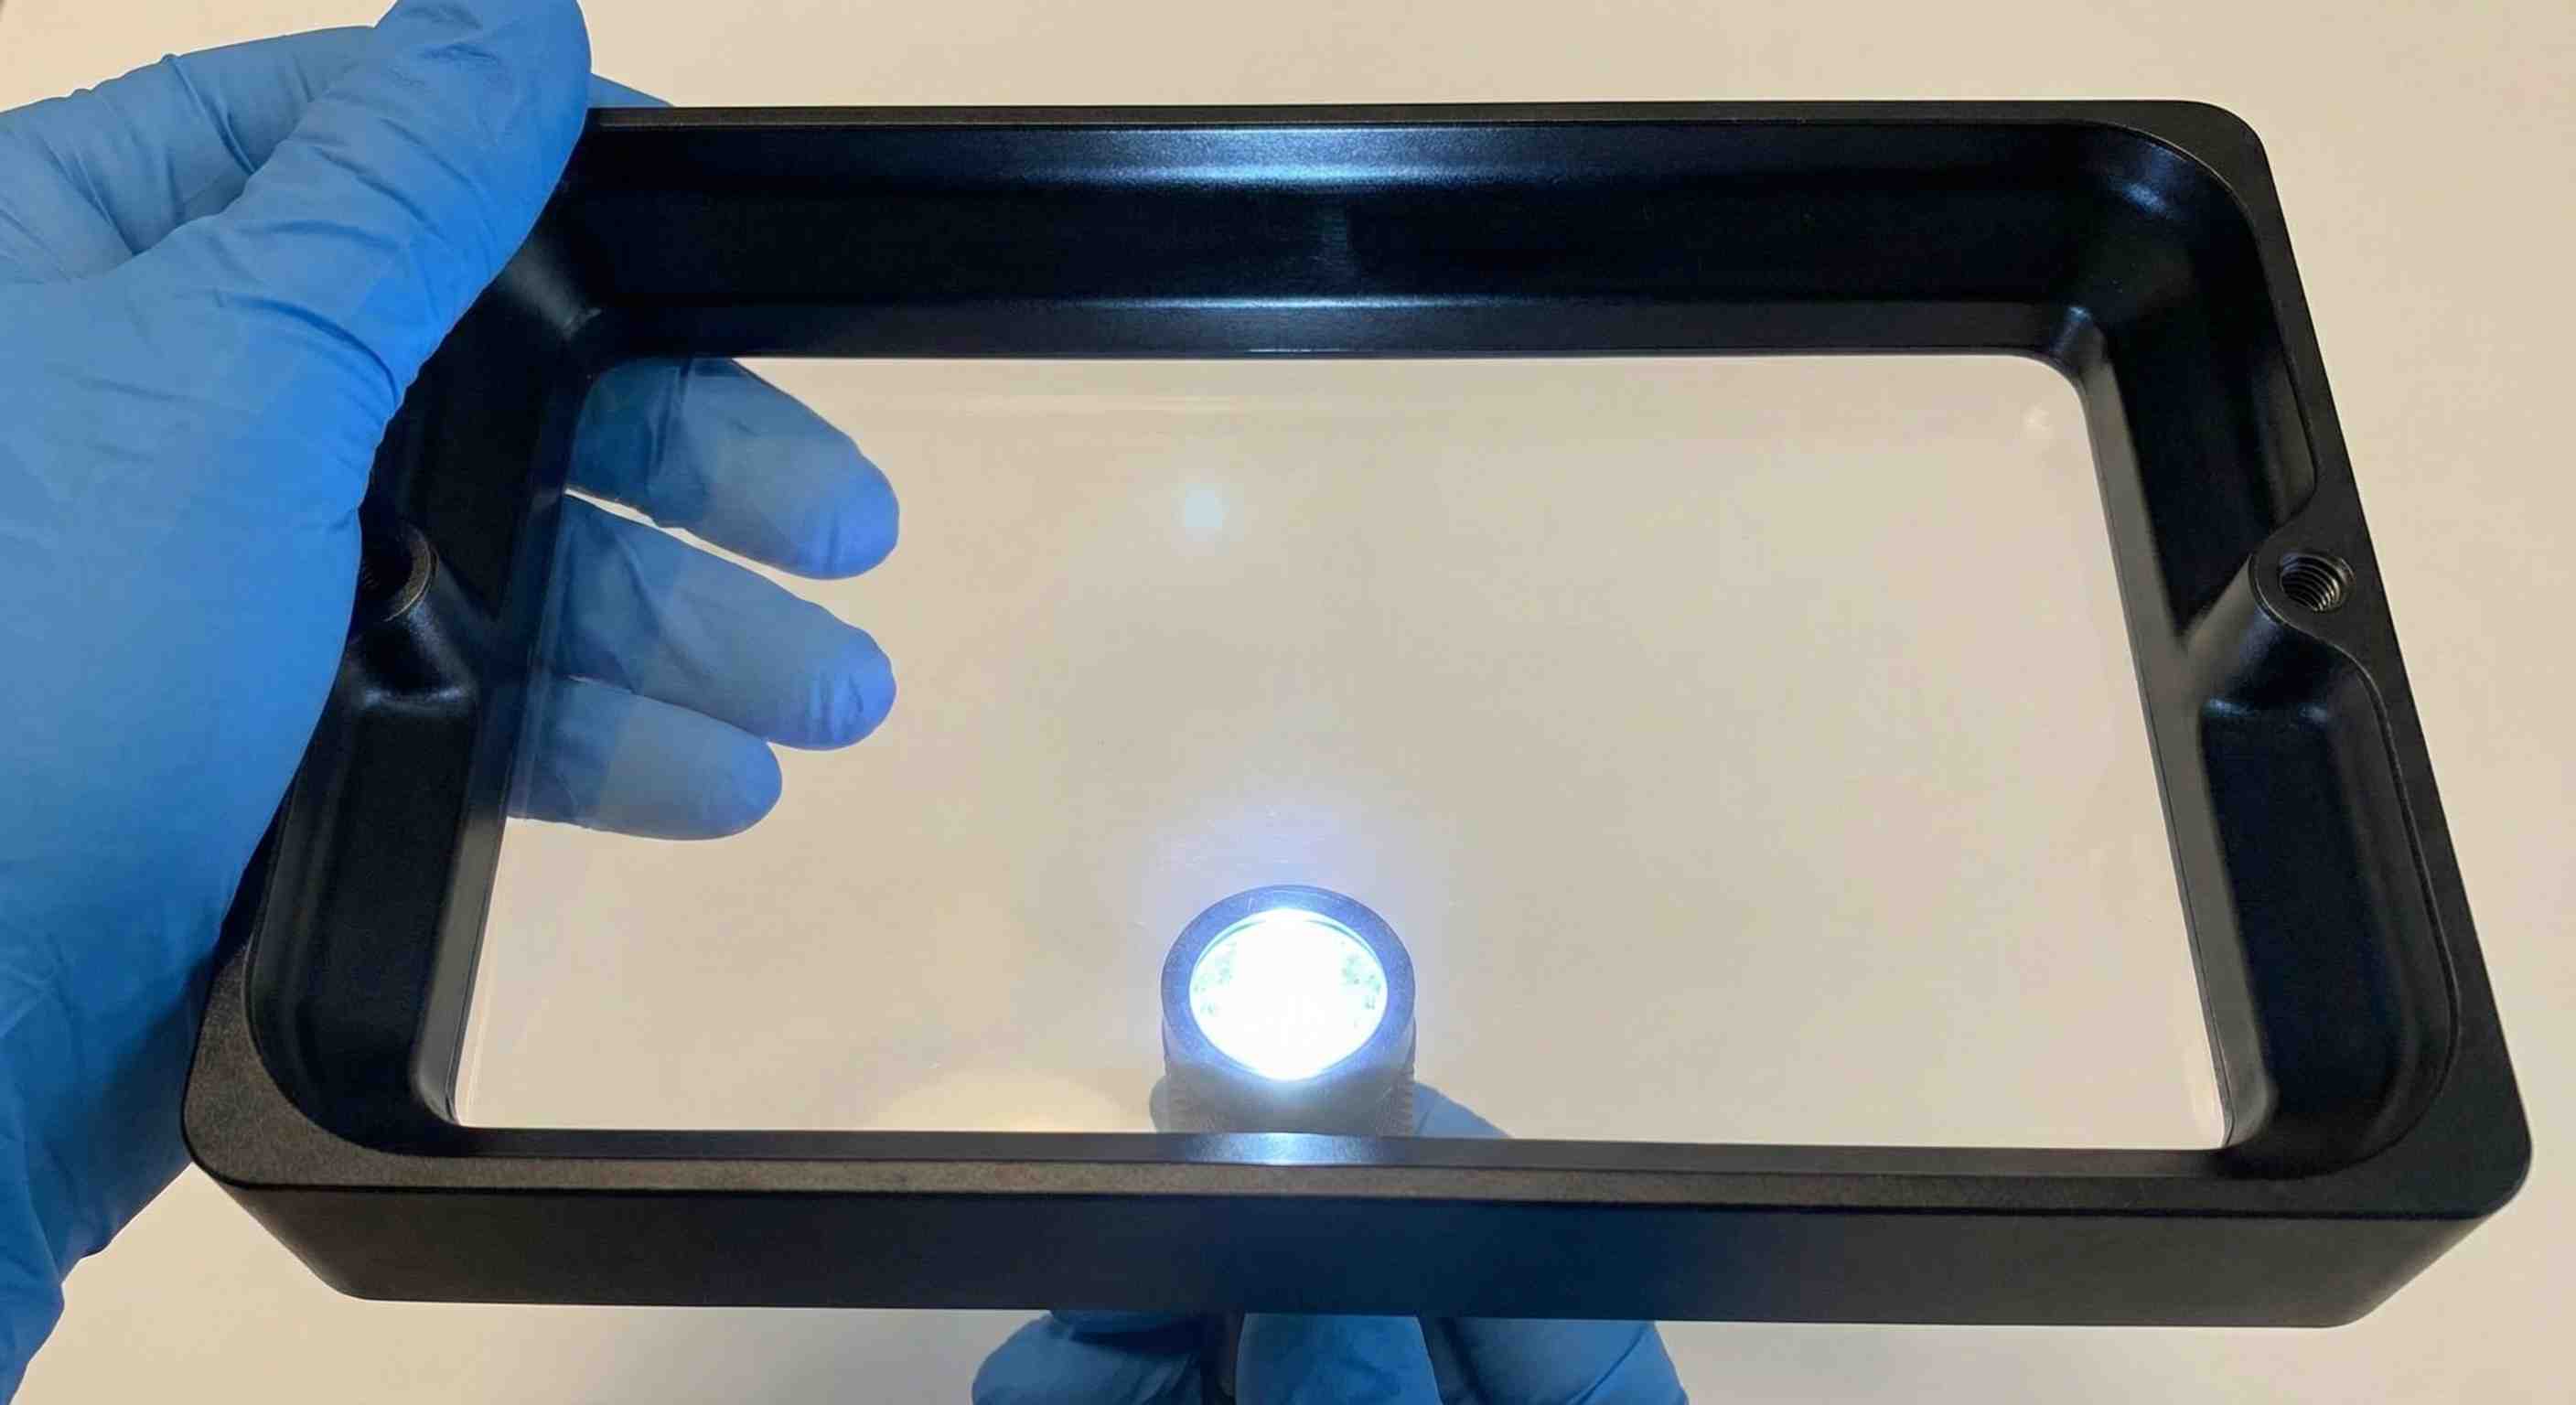
- Inspect from below with a flashlight—you should see zero streaks
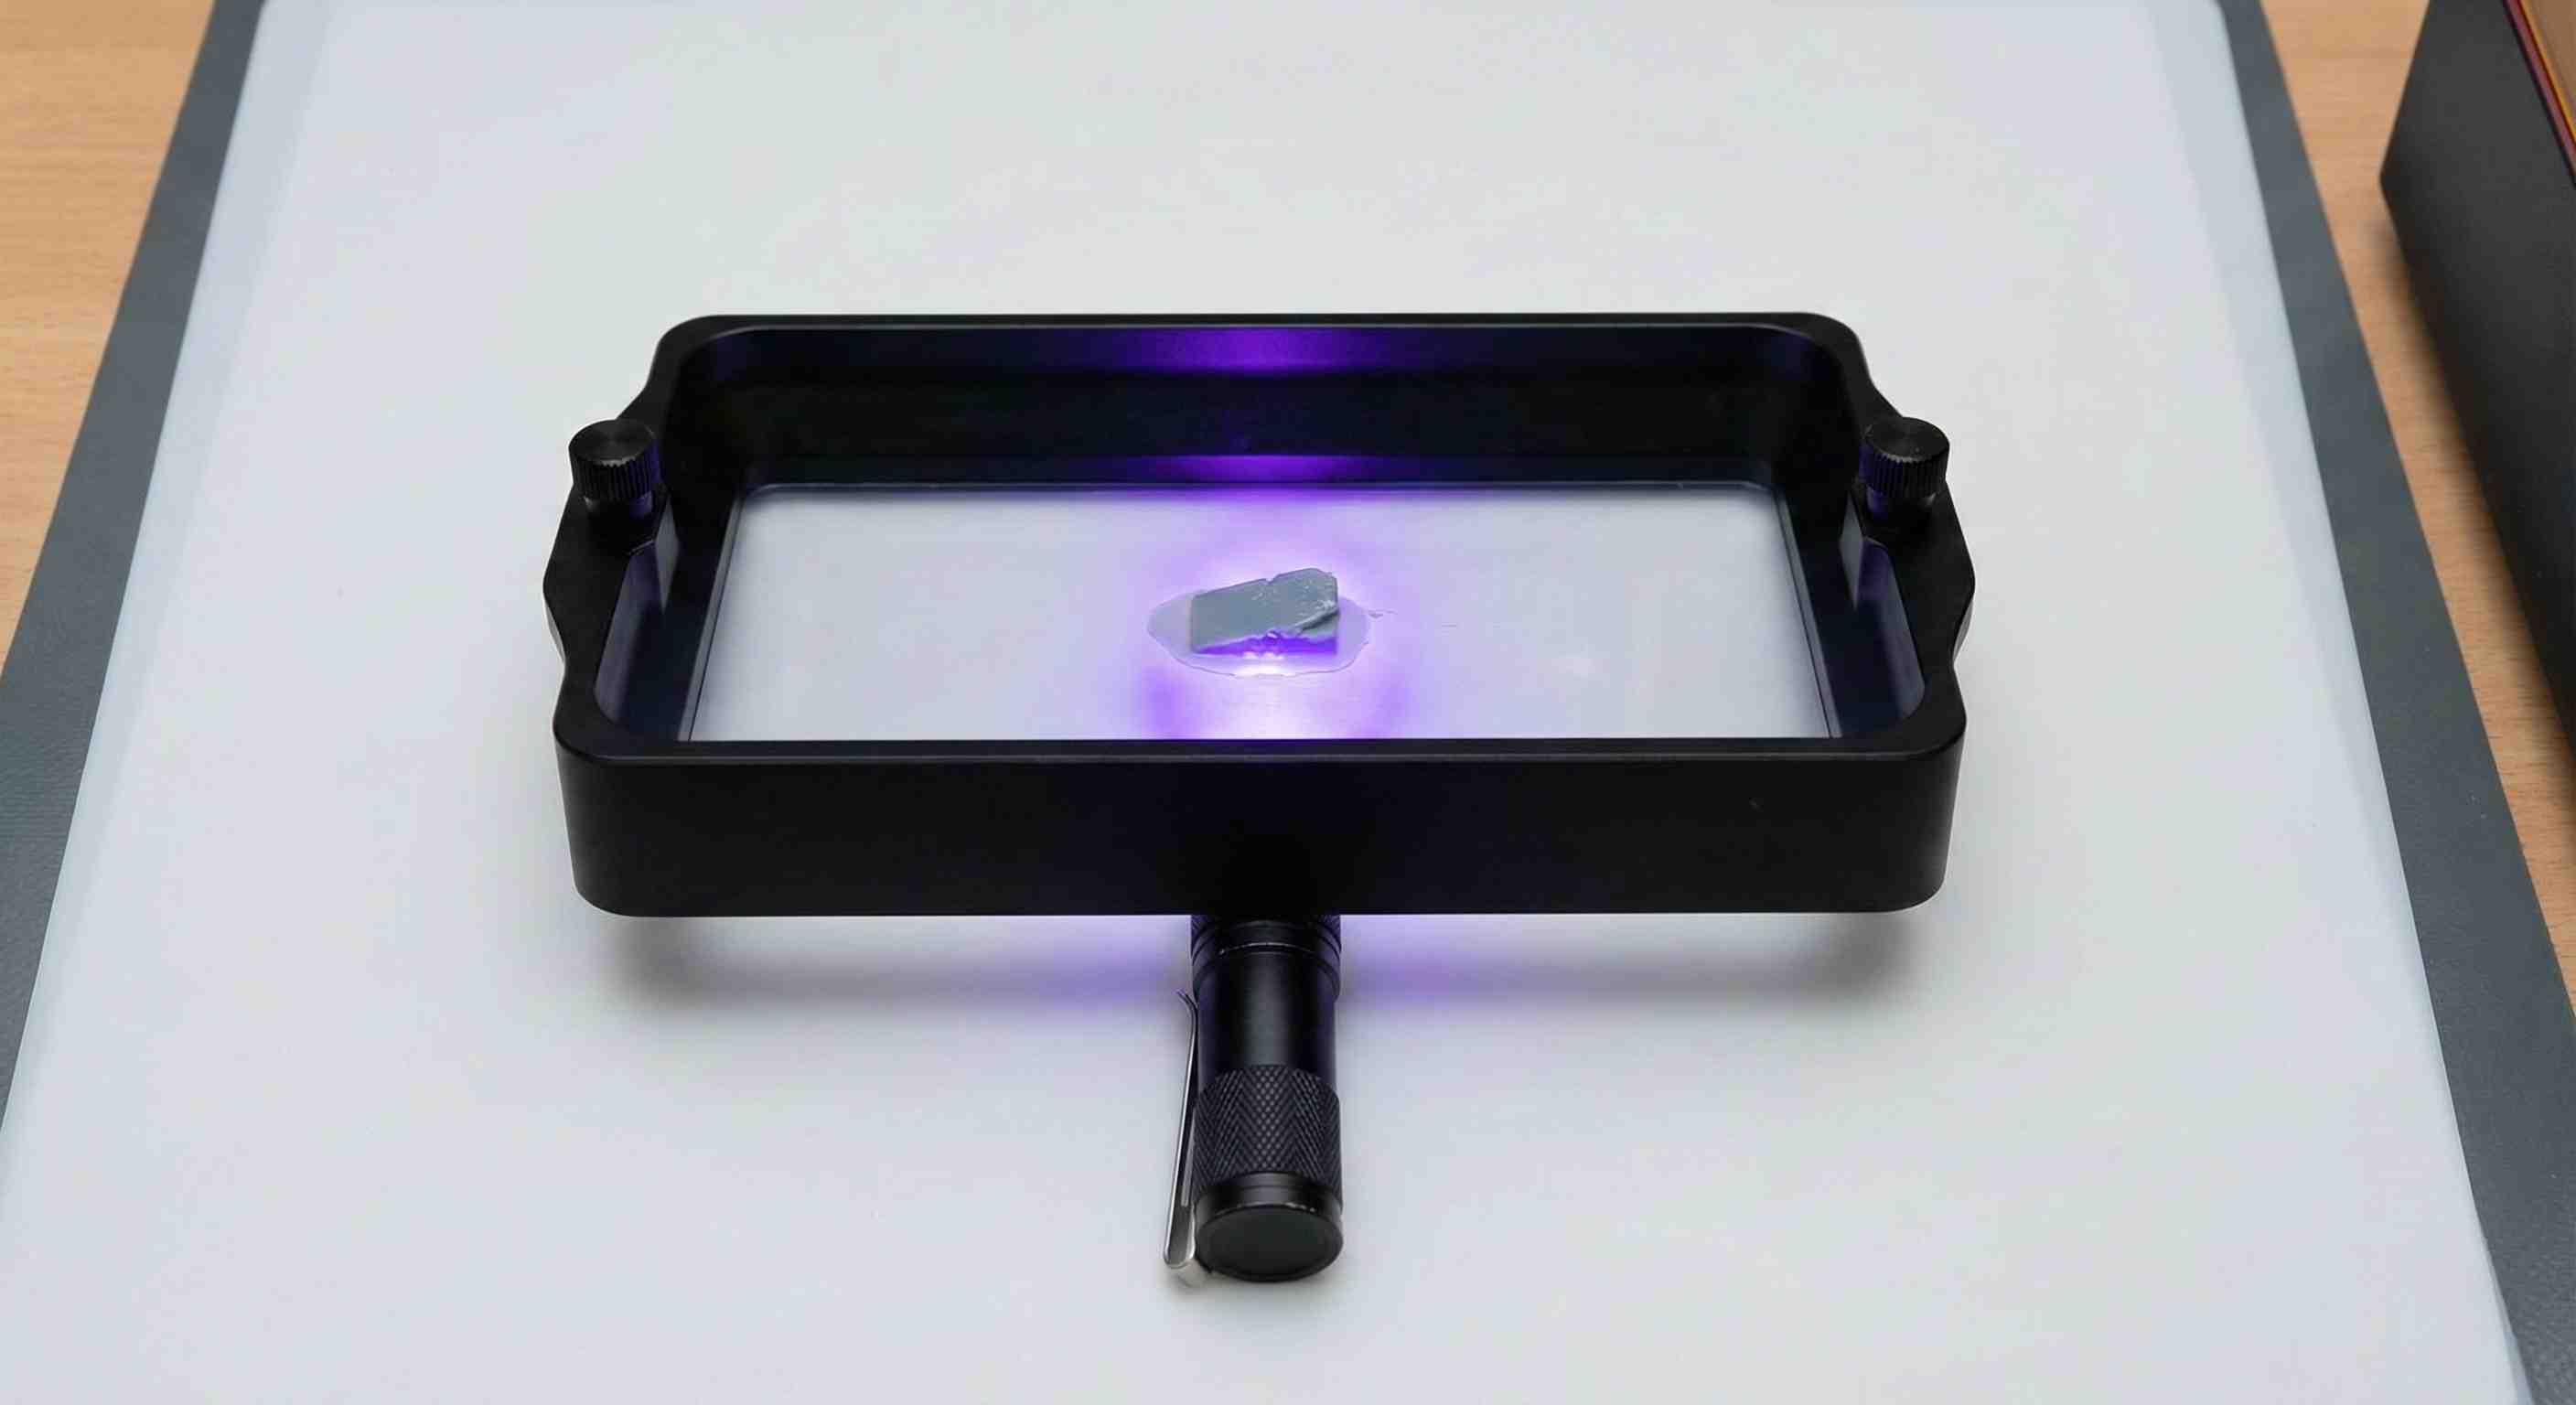
For stubborn cured resin stuck to FEP:
- Flip vat upside down so FEP faces upward
- UV cure the stuck piece: sunlight 3–5 min, UV nail lamp 2–3 min, or UV flashlight 60–90 seconds moving slowly
- Fully cured resin shrinks slightly and loses adhesion
- Flex method: gently press FEP from underneath while supporting the frame
- If still stuck: use plastic scraper at <15° angle, pushing away from you
- Finish with standard IPA cleaning
The Ultimate Vat Cleaning Setup
Having the right tools makes this so much easier:
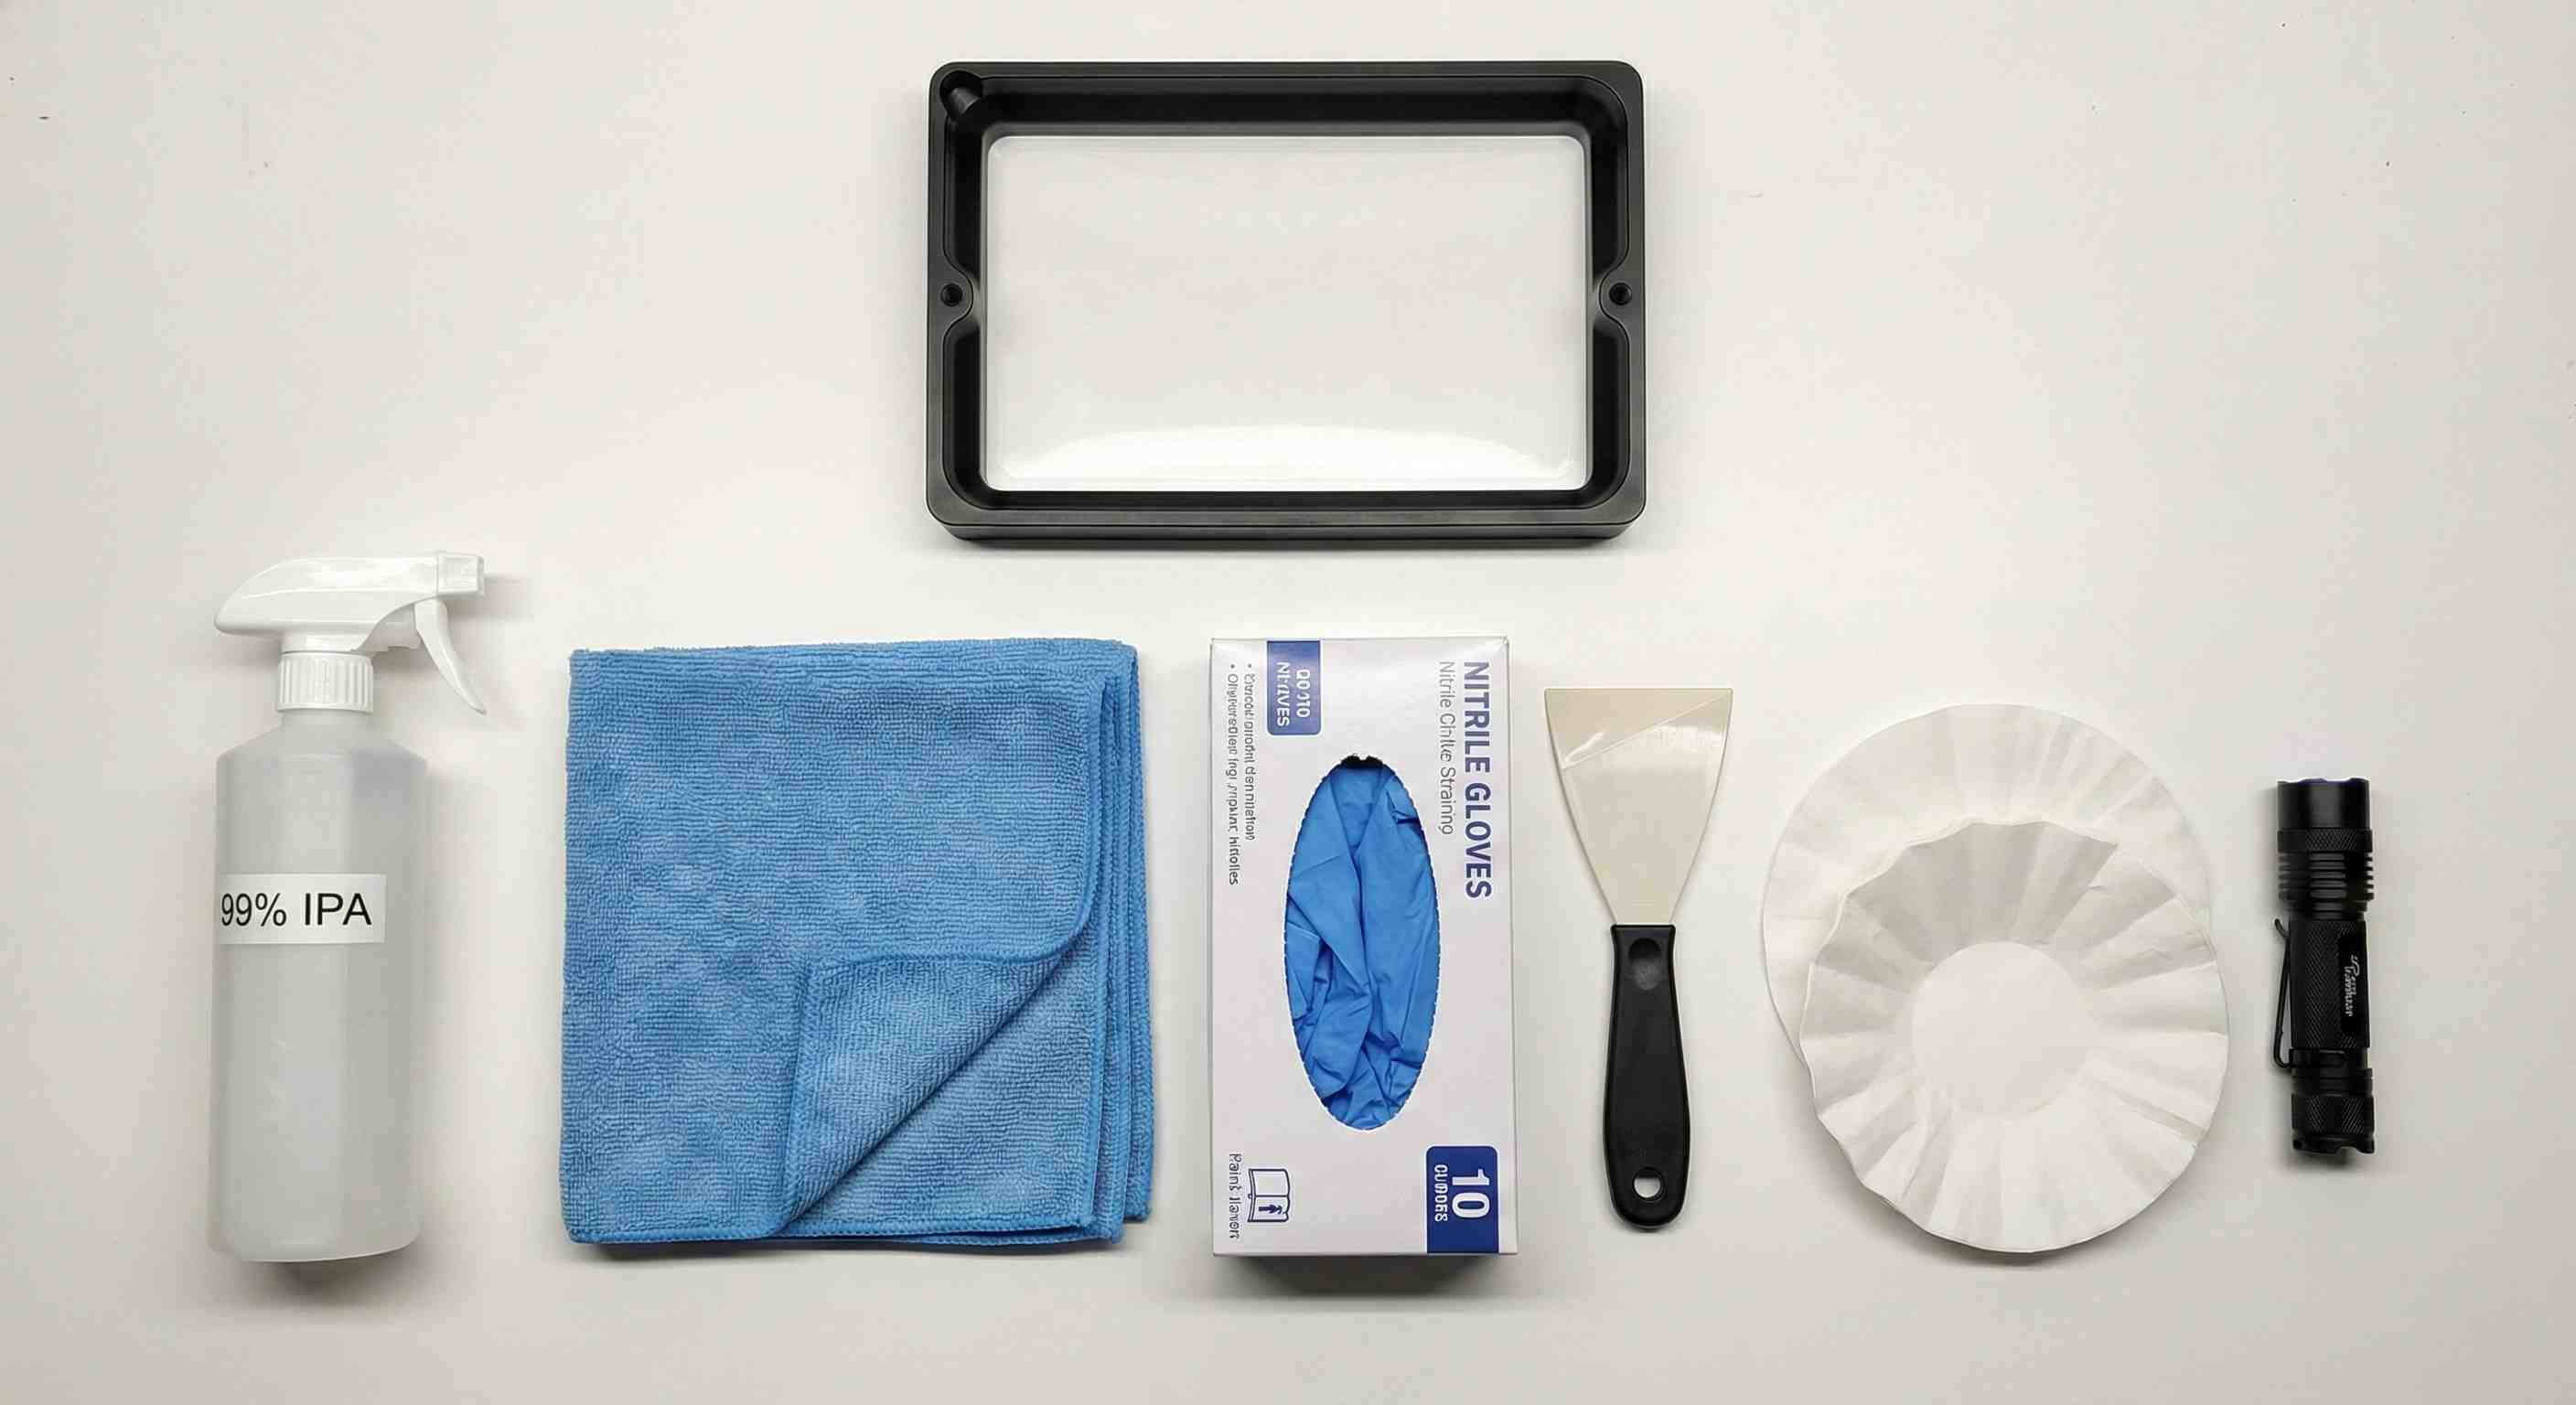
Essential:
- Paint strainers 50-pack (link) — Filter resin when pouring back; catches debris and cured bits
- 90%+ IPA (link) — For FEP cleaning; high purity, fast evaporation. Use in spray bottle
- Microfiber cloths (link) — Dedicated to resin printing; never use paper towels on FEP
- Nitrile gloves (link) — Protect your hands when handling resin
- Plastic scrapers (link) — For stubborn cured resin; never use metal on FEP
Nice to have: dedicated vat cleaning tray, UV flashlight (link) for curing stuck resin, magnetic stirrer, extra empty bottles. Total: about $30–40, lasts for months.
Time-Saving Hacks
1. The Cure-It-In-Place Method
For failed prints stuck to FEP: don't scrape immediately. Leave the print where it is, remove the vat, flip upside down, place in direct sunlight for 5–8 minutes (or UV nail lamp 3–4 minutes). Fully cured resin shrinks ~2–4% and releases. Flex the vat gently from underneath—the piece pops off. Zero scratches vs. scraper gouges.
2. The Double-Bottle System
Bottle A: fresh resin. Bottle B: filtered resin from vat. Use A for critical prints, B for test prints. When pouring back, always into B. When B reaches ~200 ml, double-filter back into A. Reduces resin waste from ~15–20% to <5%.
3. Pre-Filter Fresh Resin
Before pouring new resin into the vat for the first time, filter it through a paint strainer. Catches pigment clumps, silicone particles, and debris—prevents ~50% of print failures from manufacturer issues.
4. The IPA Bath Deep-Clean
For nasty vats: pour 100–150 ml IPA into empty vat, swirl, let sit 10–15 minutes. Chemistry dissolves uncured resin. Pour out, wipe with microfiber. Cost: ~$0.50 vs. risking a $15 FEP.
Advanced FEP Care: The Tension Check
Loose FEP causes elephant's foot, layer shifting, and suction problems.
The drumhead test: Tap the center of the FEP with your fingernail. It should make a clear "ping" like a drum (~200–300 Hz). If dull or silent, it's too loose.
Visual test: Look at FEP from the side—it should be perfectly flat with no waves or sag.
To retighten: Loosen all screws half a turn, tighten opposite corners in a star pattern, quarter-turns at a time. Over-tightening is worse than slightly loose.
Common Mistakes to Avoid
- Cleaning too aggressively: Let IPA do the work—give it time instead of elbow grease.
- Using dirty IPA: Contaminated IPA leaves residue. Use fresh IPA for final wipes.
- Ignoring the vat frame: Resin builds up on edges. Wipe the frame monthly.
- Skipping the filter: Always filter. Paint strainers cost pennies.
- Metal tools in the vat: Use plastic scrapers only.
Maintenance Schedule
- After every print: Visual inspection of resin
- Every 3–5 prints: Filter resin through strainer
- Every 10 prints: Standard vat cleaning (Level 2)
- Monthly: Deep clean, inspect FEP, clean vat frame
- Every 3–6 months: Replace FEP or when damaged
How to Tell When FEP Needs Replacement
Replace when:
- Visible tears or punctures
- Permanent cloudiness that doesn't clean off
- Ripples or waves in the film
- Prints consistently failing in one area
- Roughness you can feel with your finger
Probably fine: minor scratches, slight yellowing (normal aging), small edge damage away from print area.
FEP lifespan: Heavy use 2–3 months; regular 4–6 months; occasional 6–12 months. Keep replacement FEP film on hand for your printer model.
The Lazy (But Effective) Method
Absolute minimum to keep your printer happy:
- Always filter resin when pouring back
- Wipe vat with IPA every 5–10 prints
- Replace FEP when prints start failing consistently
- Keep your workspace clean
Should You Get a Second Vat?
If you print with multiple resin types regularly: yes. A spare vat ($30–50) eliminates cleaning between changes and prevents cross-contamination. Label clearly: "Standard Grey," "Clear Resin Only," etc.
Quick FAQ
- How often should I clean my vat?
- Standard clean every 10 prints or when changing resins. Deep clean monthly or after failures.
- Can I reuse filtered resin?
- Yes, indefinitely if filtered properly. Don't mix different resin types or brands.
- What IPA concentration should I use?
- 90% or higher. Lower concentrations leave more residue.
- My FEP is cloudy—is it ruined?
- Not necessarily. Slight cloudiness is normal. If prints still succeed, keep using it.
- How tight should FEP be?
- It should sound like a drum when tapped—a clear, resonant tone. Too loose causes problems.
- Can I use paper towels on the vat?
- On metal parts, yes. On the FEP film, no—use microfiber only.
- What's the best way to store unused resin?
- In the original bottle, away from light, at room temperature. Shake gently before use.
- How do I know if my vat is clean enough?
- If you can see through the FEP clearly and there's no visible debris, you're good to go.
Final Thoughts
Vat cleaning doesn't have to be complicated. Use the 5-minute standard clean (Level 2) as your default. Deep cleans monthly or after failures. Filter between every resin pour. That covers 95% of situations.
Your FEP film will last longer, your prints will succeed more often, and you'll spend less time cleaning and more time making cool stuff.
Stop overpaying for 3D filament!
Compare brands and save today. Our tool shows real prices from Amazon, Ebay, AliExpress and manufacturer stores.
Compare brands & save today